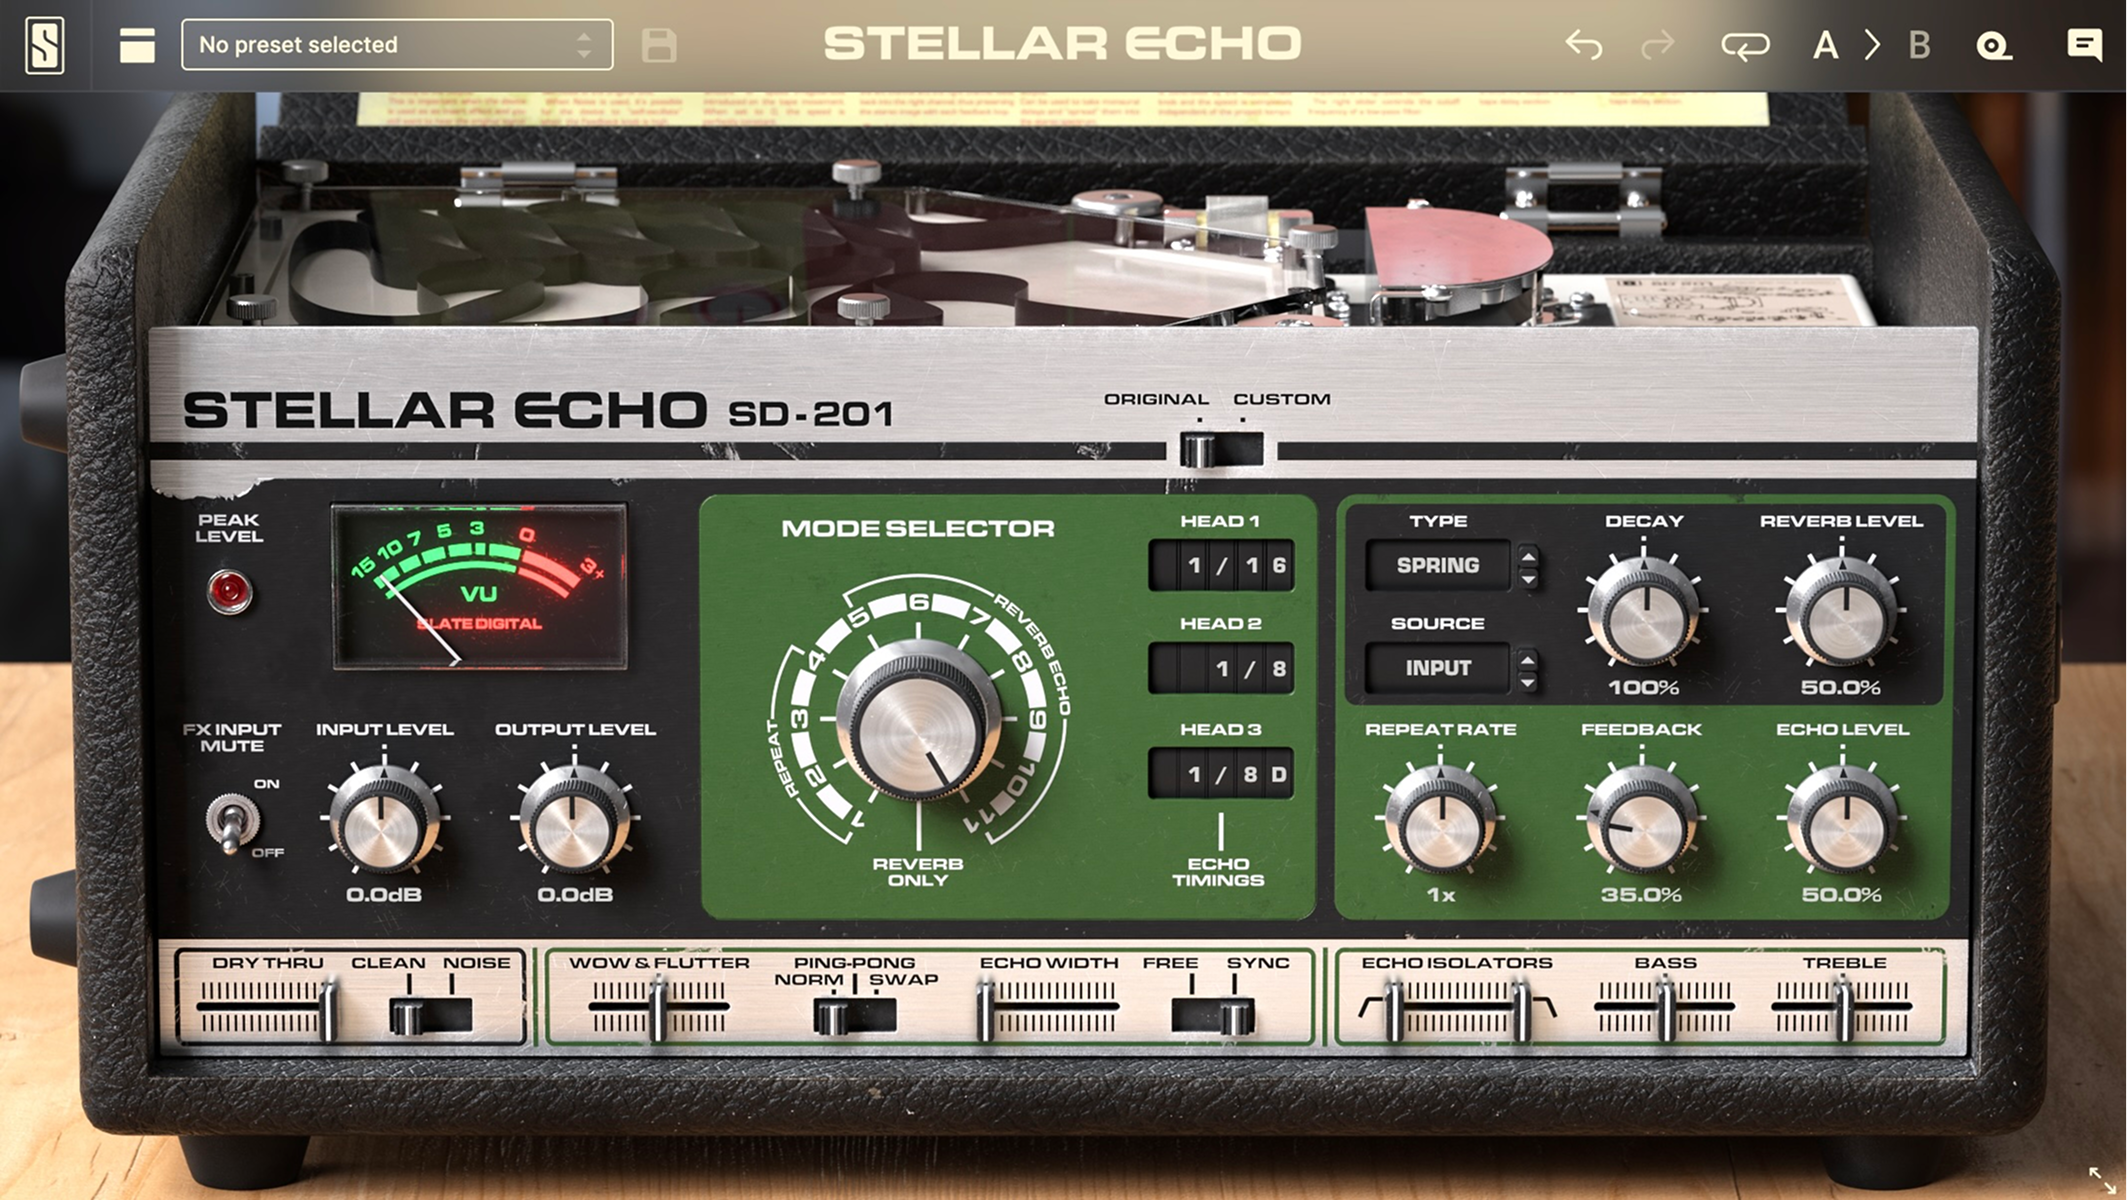
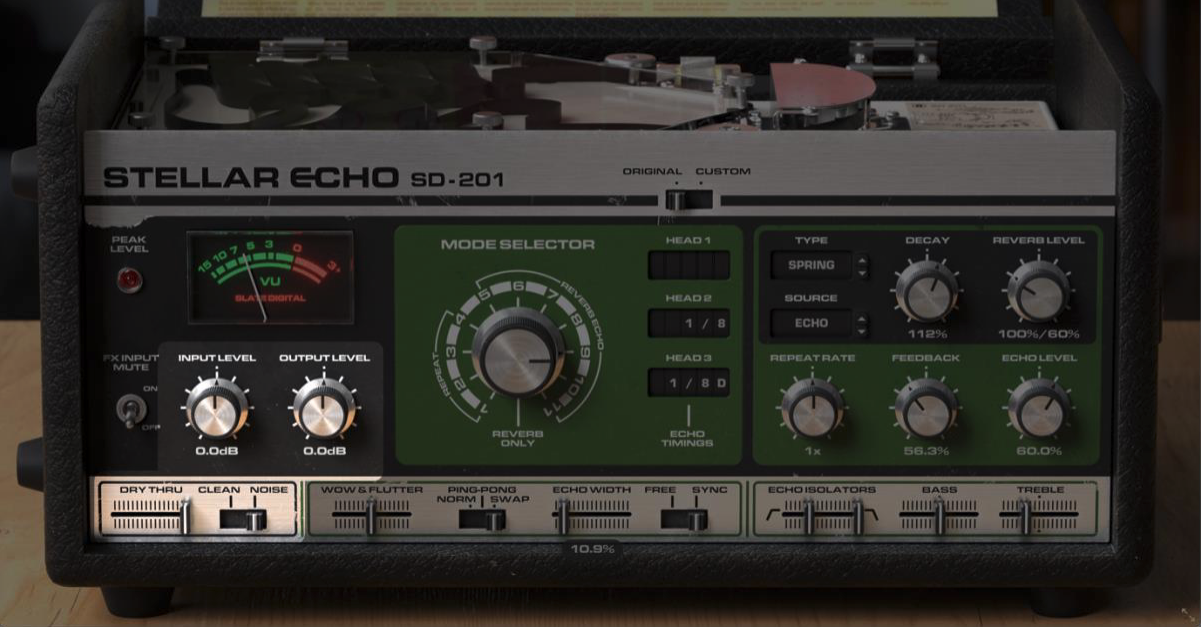
Stellar Echo SD-201
Before the advent of affordable digital memory and processors, audio delay effects were implemented by various analog means. One of the most successful analog implementations to arise in the 70’s is the tape delay where audio is recorded to a moving loop of magnetic tape using a record head and then played back moments later by one or more subsequent playback heads. The delay time is adjusted by changing the running speed of the tape loop; the slower the tape moves, the longer the delay becomes as it simply takes longer for the recorded audio to reach a playback head.
While a tape delay certainly creates delayed audio, as an analog mechanism, it imparts a number of inconsistencies and colorizations which give tape delays a unique character distinct from modern digital delays. Digital delays create exact copies of audio and delay them by exact amounts; tape delays create approximate copies of audio and delay them by approximate amounts. While digital delays are indispensable for their precise, consistent, and reliable performance, sometimes the imprecisions of tape delays are desired to provide new textures, colors, and playability in a production. Subtle variations in tape playback speed and the non-linearities and saturations of magnetic tape recording yield warm, lush, chorus-like delays with a level of real-time control that have allowed producers to use tape delays as instruments themselves.
With the introduction of Stellar Echo SD-201, Slate Digital brings to you an extremely faithful recreation of one of the most famous tape delay units found on countless records from the 70’s up through today. It meticulously recreates the sound and experience of using a tape delay while offering numerous improvements to make it easier to use in modern production workflows. Stereo operation, project tempo synchronization, and full customization of delay timings, to name a few, allow Stellar Echo SD-201 to add that desired tape delay sound to your songs with a flexibility and speed that is completely impossible on the original hardware. Read on to learn how to harness all of the power within this plug-in to bring this characteristic sound and performance to your own music.
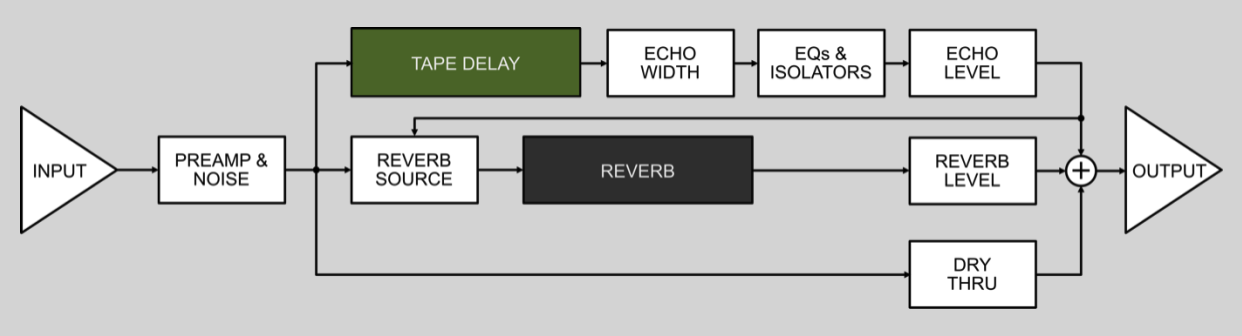
Structure & Signal Flow
Stellar Echo SD-201 is actually a combination of two primary effects: the Tape Delay section which can create up to 4-tap delays, plus a configurable Reverb section. The combination of delays and reverb is what enables Stellar Echo SD-201 to create the truly psychedelic delay effects it is known for. Unlike the original hardware unit, Stellar Echo SD-201 allows for deep configurability of the signal flow between these two sections offering you more creative options than the original.
Tape Delay Controls
The majority of the controls on Stellar Echo SD-201 are for the Tape Delay section. They are used to set delay times, the active of delay heads (sometimes referred to as “taps”), feedback amounts, and color.
MODE SELECTOR Knob
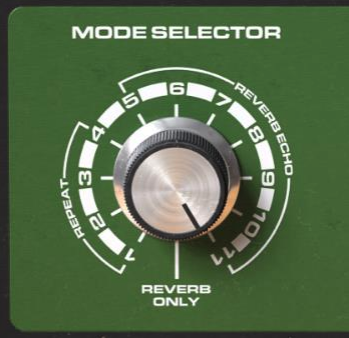
The main visual characteristic of the Original mode is the large MODE SELECTOR knob in the center of the front panel. This is a 12-position knob which selects various combinations of the 3 tape heads (delay taps) and the Reverb. In positions 1-4, various combinations of tape heads are enabled while the Reverb is disabled. Positions 5-11 select combinations of tape heads in addition to enabling the Reverb. Position 12 disables all tape heads and only the Reverb is active.
When rotating the MODE SELECTOR knob, you will see numbers appear in the ECHO TIMINGS displays to the right. If numbers appear in one of the displays, this indicates that this particular head is active while displays with no numbers indicate the head is deactivated. Similarly, the Reverb displays will be dark grey when the MODE SELECTOR is in positions 1-4 as these positions disable the Reverb.
ECHO TIMINGS Displays
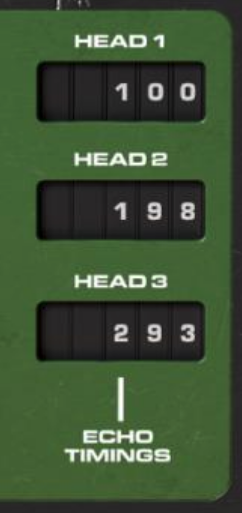
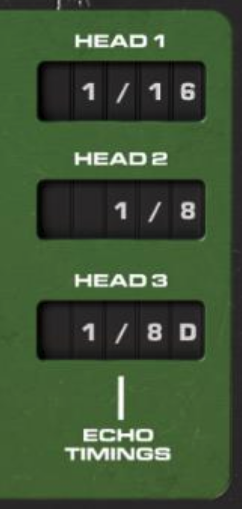
To the right of the MODE SELECTOR knob are three ECHO TIMINGS displays. These displays were not on the original hardware, but they’ve been added to give you helpful information about the actual delay times of the various heads. The delay values shown in these displays will either be time values (in milliseconds) or musical values (fractions of musical note durations) depending on the setting of the FREE/SYNC switch and will change depending on the position of the REPEAT RATE knob and/or the tempo of your host application. If no value is shown, this means the associated head is disabled by the current setting of the MODE SELECTOR knob.
FREE/SYNC Switch
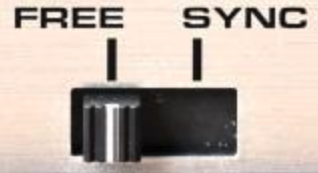
This switch is used to either allow free adjustment of the delay times or to sync the delay times to the host application’s current tempo.
When set to the FREE position, Stellar Echo SD-201 will function just like the original hardware where the delay time needs to be set by hand using a combination of the MODE SELECTOR and REPEAT RATE knobs. Stellar Echo SD-201 will also ignore any tempo changes in your host application while in Free mode. The ECHO TIMINGS displays will show values in milliseconds while in Free mode.
However, when set to the SYNC position, Stellar Echo SD-201 will now match the tempo of your host application automatically. The ECHO TIMINGS displays will now show values as fractions of a musical note to help you quickly select a delay time in terms of musical rhythm. Additionally, Stellar Echo SD-201 will also follow tempo changes in your host application while in Sync mode to ensure the musical timings you’ve selected for the delays remain consistent even if your song changes tempo.
Pro Tip: If you hold the SHIFT key when switching from Sync to Free mode, the REPEAT RATE knob will automatically be set to a position that maintains the current delay time from Sync mode.
REPEAT RATE Knob
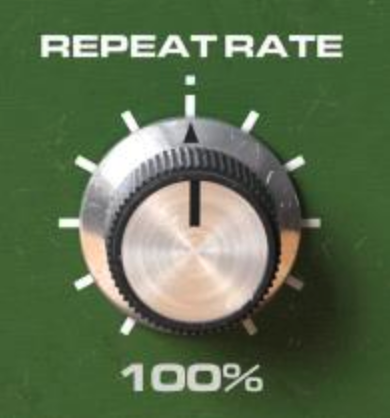
You change the delay time of the Stellar Echo SD-201 with the REPEAT RATE knob. On the original hardware, this knob controls the speed of the motor driving the tape loop. Turning the REPEAT RATE counter-clockwise slows down the motor, thus increasing the delay times; conversely, rotating the knob clockwise speeds up the motor, thus decreasing the delay times. The change in delay times will be reflected in the ECHO TIMINGS displays.
When in Free mode, the REPEAT RATE knob moves smoothly allowing you to fine-tune the delay times by hand.
When in Sync mode, this knob now serves as a musical multiplier or divider—you can choose to run as slow as 1/4 the host tempo or up to 4x as fast as the host tempo with this knob. If you hold the SHIFT key, you will be able to turn this knob to apply a temporary offset to the current speed, thus being able to introduce smooth speed changes. Release the SHIFT button and the Repeat Rate will return to its original synced position.
One critical characteristic of a tape delay—and one of its most enjoyable quirks—is that changing the REPEAT RATE will introduce pitch changes to any audio that is currently on the tape. If you increase the REPEAT RATE, this speeds up the tape loop causing any audio on the tape to go up in pitch; conversely, decreasing the REPEAT RATE slows the tape loop causing any audio on the tape to go down in pitch. This authentic behavior has been implemented exactly in Stellar Echo SD-201.
Additionally, because the tape motor cannot change speed instantaneously, you’ll notice that the tape speed will sometimes take a moment to settle on the new speed you’ve selected with the REPEAT RATE knob. When you see the timings in the ECHO TIMINGS displays stop moving, you’ll know that the tape speed has now settled at the new setting.
As a last note, if you’re using Sync mode to follow the tempo of the host application, you’ll also hear pitch changes if the host’s tempo changes—Sync mode mimics following the tempo of the song as if you’d changes the tape speed by hand thus creating the same pitch changes that result from changing the tape speed in Free mode.
FEEDBACK Knob
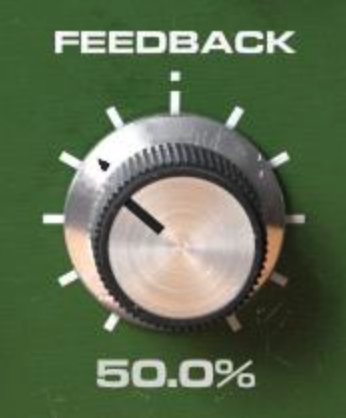
Stellar Echo SD-201 features multiple tape heads for creating multi-tap delays. That is, a single sound entering Stellar Echo SD-201 can be output more than one time depending on how many tape heads are enabled, up to 3 taps in Original mode and up to 4 taps in Custom mode.
The FEEDBACK knob allows you to create many more delays than this, however, by taking some portion of the sound output from the tape heads and recording it back onto the tape again. A setting of 50% on the FEEEDBACK knob, for example, will record the delay output back onto tape at half volume. The result is that you will then hear another delay half as loud as the previous. This delay will also be recorded again, playing back at one quarter the loudness, which will then be recorded again…repeating again and again until the delay eventually fades into silence.
Like the REPEAT RATE knob, the FEEDBACK knob is one of the most fun to use on a tape delay because, if you set the Feedback high enough (around 100%), you can create an infinite loop where the delayed audio is continually re-recorded onto the tape loop and never fades into silence. Even more, if you increase the Feedback beyond 100%, you will find that each iteration is now louder than the one before it; when the audio gets loud enough, it will start to saturate the recording which results in another sound and texture so characteristic of tape delays.
But be careful! The FEEDBACK knob can go as high as 150% which can cause the delays to pile up and “explode” very quickly—make sure to protect your ears and speakers when doing this!
ECHO LEVEL Knob

The ECHO LEVEL knob sets the overall output level of the tape delay section. When this knob is set to 0%, the tape delay will be completely silenced at the output of Stellar Echo SD-201. You can therefore set this at a level that is appropriate for your music and/or at a good volume relative to the Reverb.
NOTE: The ECHO LEVEL knob only controls the output level of the tape delay. Depending on the settings of the other controls, especially the FEEDBACK knob, it’s possible that there is still sound on the tape loop even with the ECHO LEVEL turned down. Turning the ECHO LEVEL knob back up can cause this audio to become immediately audible again which, if the FEEDBACK knob is high, could be very loud.
WOW & FLUTTER Slider
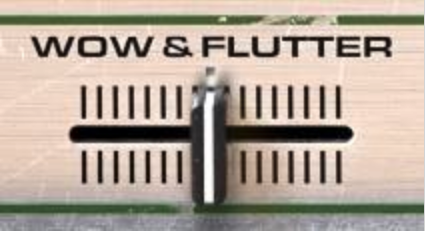
Because tape delays are mechanical devices, they suffer a bit of mechanical instability and inconsistency. This means the actual speed of the tape loop may vary ever-so-slightly even when you’re not manipulating the REPEAT RATE knob. But it’s this speed instability that gives tape delays part of their charm because the speed instability also results in pitch instability of the delays. Each delay may therefore be just slightly out-of-tune with the original which leads to the more lush and chorused character of a tape delay (compared to a precision digital delay) as these imperfect copies layer on top of each other.
The WOW & FLUTTER slider allows you to influence the amount of speed instability in Stellar Echo SD-201. The default position of 50% provides a common, realistic amount of speed variance compared to the original hardware. Moving the slider to the right will increase the amount of variance making the pitch instability more obvious, thus mimicking a hardware device with some mechanical problems. Conversely, you can also move the slider to the left to reduce the variance—you can even turn it all the way down to 0% which removes all instability such that the timing of each delay is precise and without pitch variance; you get the accuracy of a digital delay but with the playful interactions and saturations of a tape delay with Wow & Flutter set to 0%.
NORM / PING-PONG / SWAP Switch

Unlike the original hardware device, Stellar Echo SD-201 operates in stereo. You can think of it as two delays running concurrently, one for the left channel and the other for the right channel. The NORM / PING-PONG / SWAP switch determines the relationships between the left and right channels when using the FEEDBACK knob.
When this switch is in the NORM (Normal) position, audio output on the left channel will be recorded back onto the left channel and audio output on the right channel will be recorded back to the right channel when the FEEDBACK knob is turned up. The stereo image of whatever you feed into Stellar Echo SD-201 will therefore be preserved during the feedback when in NORM mode.
When set to SWAP, now the audio output on the left channel will be recorded back onto the right channel while audio output on the right channel will be recorded back onto the left channel when using feedback. This means that the stereo image will swap or “invert” with each feedback iteration.
When set to PING-PONG, the delays will appear to bounce back and forth between left and right channels. All input audio, plus the right channel output, will be summed together and recorded to the left channel. Only the delayed audio output from the left channel will be recorded back to the right channel when using feedback. Therefore, the image of stereo audio fed into Stellar Echo SD-201 will be destroyed in this mode, but this mode can be used to create a kind of stereo image from monaural audio.
ECHO WIDTH Slider

An alternative way to add stereo width to monaural material fed into Stellar Echo SD-201 is with the ECHO WIDTH slider. Normally, this effect is set to 0% meaning it has no effect. But moving the slider to the right will create an interesting stereo width effect on the output of the delays—a monaural input can therefore come out Stellar Echo SD-201 in stereo when using this slider. This can be an effective trick to use on vocals as the main vocal can remain in the center while the delayed vocals created with Stellar Echo SD-201 can be “pushed out to the sides” by increasing the Echo Width.
ECHO ISOLATORS Sliders
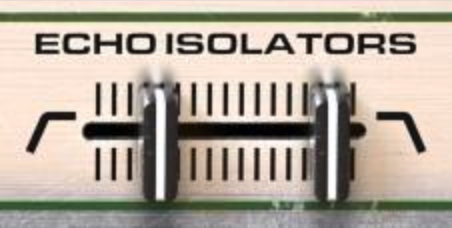
After the tape delay audio passes the ECHO LEVEL knob, it passes through the Echo Isolators which are a pair of high-pass and low-pass filters. The left slider controls the cutoff frequency of the high-pass filter—moving it to the right increases the cutoff frequency, thus removing bass frequencies from the tape delay output. The right slider controls the cutoff frequency of the low-pass filter—moving it to the left decreases the cutoff frequency, thus removing treble frequencies. You can use these sliders in combination to “focus” the sound of the delay in a specific frequency range.
NOTE: The Echo Isolators are not in the delay feedback path. They do not impact any of the audio currently feeding back in the tape delay. If you, for example, move the low-pass slider all the way to the left, this will make the output of the tape delay go silent. But if you then move the slider to the right, you will again hear the audio that is still feeding back in the delay.
BASS and TREBLE Sliders

The BASS and TREBLE sliders function similarly to the ECHO ISOLATOR sliders in that they only affect the output of the delay. Instead of controlling high- and low-pass filers, these sliders control the gains of a low- and high-shelf EQ, respectively. This can be used to compensate for tonal differences that occur from recording onto the analog tape delay.
FX INPUT MUTE Switch
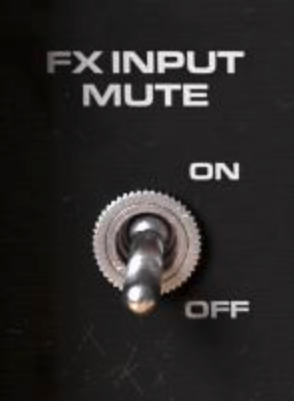
The FX INPUT MUTE switch is used to cut off audio being fed into the Tape Delay and Reverb sections of Stellar Echo SD-201. It can be useful to cut off incoming audio when creating an infinite loop with high Feedback settings—muting further input helps prevent the infinite loop from getting louder due to more and more incoming audio being added to it.
PRO TIP: The FX INPUT MUTE switch is also useful for just “catching” small bits of audio, a technique common in dub and reggae. For example, maybe you only want a quick snare drum roll to go through Stellar Echo SD-201 at the end of a drum fill. You can leave the FX MUTE SWITCH on until that snare roll happens; switch the mute off for the snare roll and then switch it back on after the roll is completed—now only the roll will be “caught” in the tape delay at which point you can manipulate it with the REPEAT RATE and FEEDBACK knobs. You could also “catch” specific words from a vocal with this technique. To make this even easier, hold SHIFT when you click this switch—it will toggle when you push the mouse button down and then immediately return to its previous position when you release the mouse button.
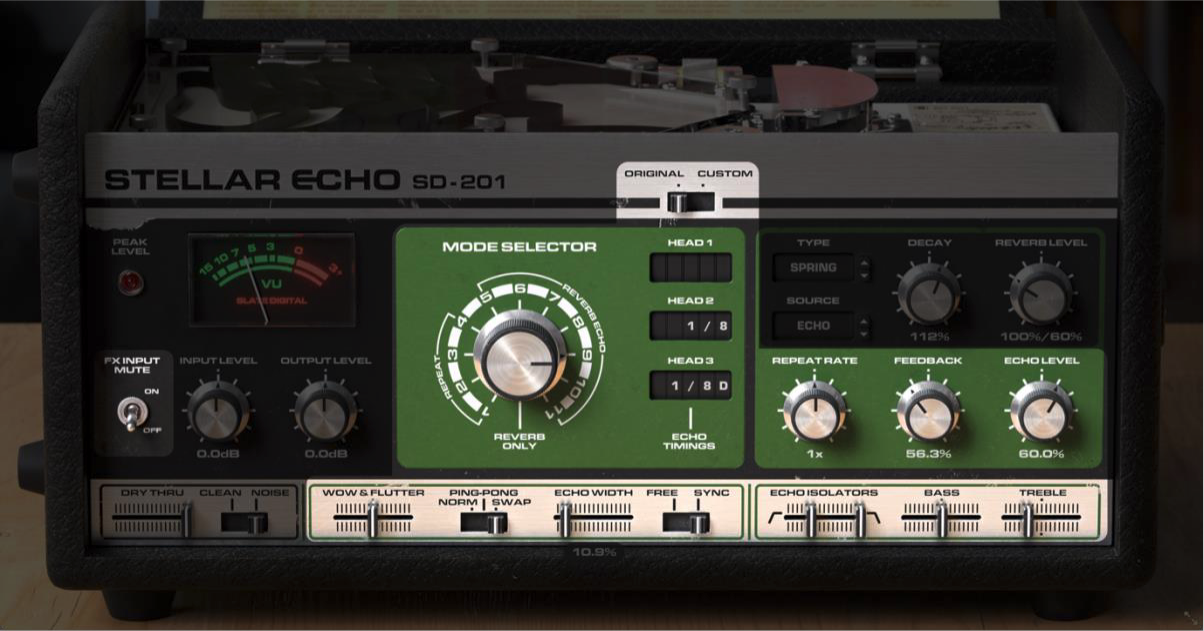
Tape Delay CUSTOM Mode Controls
The Tape Delay section has two different modes, Original and Custom, which can be selected with the ORIGINAL / CUSTOM switch at the top-center of the front panel.
The original hardware had a number of limitations which the Original mode recreates for an authentic experience. But don’t let this deter you—with those limitations also provide speed and ease of use. Because of this, Stellar Echo SD-201 loads up in Original mode by default so you can start creating delays quickly.
Once you have familiarized yourself with how Stellar Echo SD-201 operates in Original mode, you can then begin to explore Custom mode which gives you access to modifications impossible with the original hardware.

The functional differences between Original and Custom modes are as follows:
| Original Mode | Custom Mode | |
|---|---|---|
| Maximum Delay Heads (Taps) | 3 | 4 |
| Delay Timing per Head (Tap) | Preset/Fixed | Adjustable |
| Gain per Head (Tap) | Fixed | Adjustable |
| Stereo Balance per Head (Tap) | Centered | Adjustable |
ORIGINAL / CUSTOM Switch

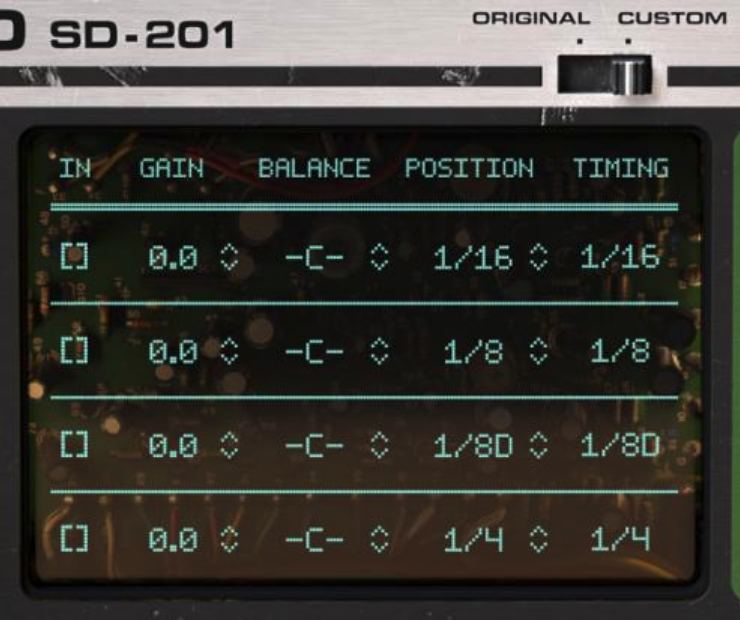
When switching the ORIGINAL / CUSTOM switch to the Custom position, the MODE SELECTOR knob and panel will be replaced with a new Custom panel. In this panel, you get deep control over the configuration of Stellar Echo SD-201—you can enable up to four tape heads, specify their gain and stereo balance, as well as configure their positions relative to the record head on the tape loop to create specialized delay timings…all of which was not possible on the original hardware.
The Custom panel features 4 rows, one for each tape head, and 5 columns of controls and displays. Those columns are described in the next sections.
IN Checkbox
The leftmost column, titled IN, contains a series of checkboxes which determines if the associated tape head is enabled or disabled. The row will appear blue when the tape head is enabled and red when disabled. Click the checkbox to toggle its state.
GAIN Control
The second column, titled GAIN, lets you set the output level of the row’s tape head. 0.0dB is the default value, referring to the gain of the original hardware. You can drag up and down on this value to change it, or click it to type in a value directly. You can increase the gain up to +12dB which can result in the delayed sound being louder than the input sound, and can also lead to higher levels of feedback when the FEEDBACK knob is used.
BAL Control
The third column is labelled BAL, referring to balance, and allows you to set the output balance of the row’s tape head in the stereo field. “-C-“ is the default centered position, but you can drag this display up and down to change position anywhere between hard-left (“L100”) and hard-right (“100R”).
POSITION Control
The fourth column, titled POSITION, allows you to set the “physical” position of the playback heads for each row. When in Free mode, this value is in miliseconds; when in Sync mode, this value is in fractions of musical note durations. Drag this value up and down to reposition the head which will affect its delay timing.
TIMING Display
The last column is titled TIMING and is just an information display. The purpose of the Timing Display is similar to the ECHO TIMINGS displays in Original mode: It shows you the actual delay time that is a result of both the head’s POSITION control and the current REPEAT RATE.
When the REPEAT RATE knob is at 100% in Free mode or 1x in Sync mode, the value shown in the TIMING display will match the value you set with the POSITION control. But as you turn the REPEAT RATE knob counter-clockwise, thus slowing the tape and increasing the delay time, the value shown in the TIMING display will increase to show the actual delay time that the head is creating. Conversely, as the REPEAT RATE knob is turned clockwise to speed up the tape and decrease the delay time, the head’s TIMING display will also decrease to show the real delay time that is being created.
NOTE: Whenever you move the REPEAT RATE knob, the value shown in the TIMING display will update immediately. However, the tape requires a bit of time to reach the target timing. While the tape speed is changing, animated dots will appear to the right of the TIMING displays. Once the dots stop animating and disappear, the tape will be running at the correct speed to yield the delay times shown.
Reverb Controls
The original tape delay hardware included a monaural spring reverb tank which could be added to the input audio. Stellar Echo SD-201 improves on this by giving you a customizable stereo reverb unit with three additional reverb types. You can also configure the source for the reverb as well as control the reverb’s decay time. All these controls are in the upper-right corner of the front panel.
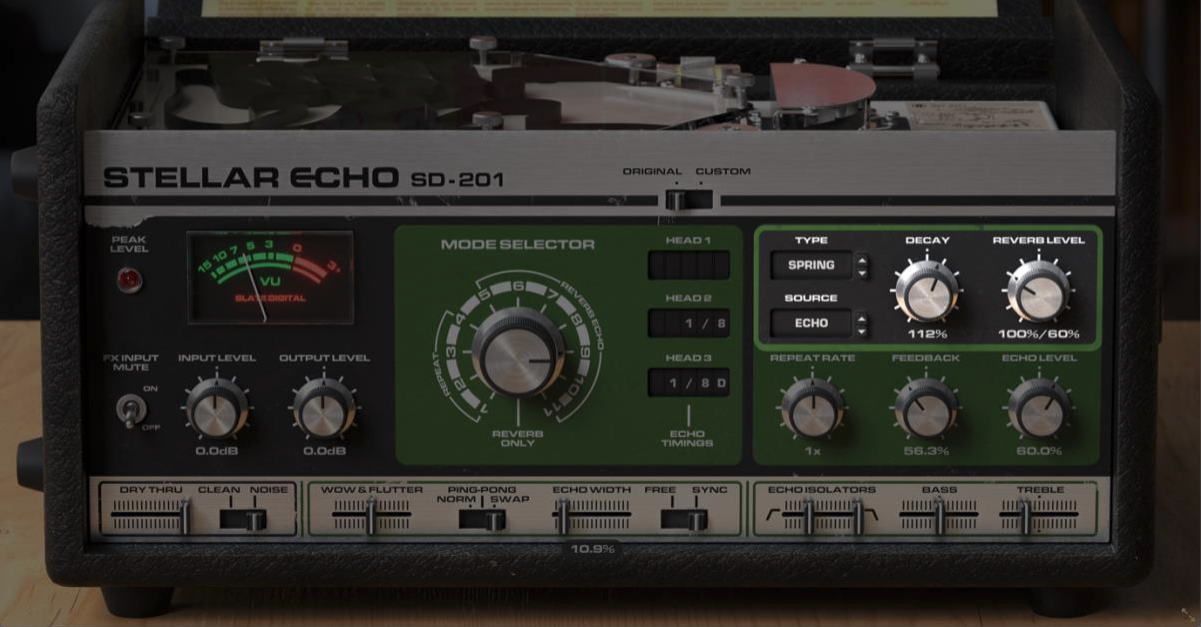
TYPE Selector
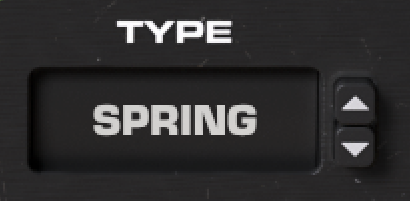
Stellar Echo SD-201 provides four different reverb types—you select the type to use with the TYPE selector. You can click on the up/down arrows to the right of the display to step up/down through the reverb type options, scroll with the mouse wheel, or click on the display to select a new setting from the pop-up menu.
The four reverb types are:
-
SPRING: Get the classic sound using the spring reverb which works in stereo.
-
PLATE: Similar in technology to a spring, the plate reverb excites a large metal plate to simulate a reverb.
-
CHAMBER: A more modern reverb algorithm that simulates a normal room with a bit of pre-delay.
-
HALL: For the most lush and psychedelic sounds, a large hall is provided with an even longer pre-delay.
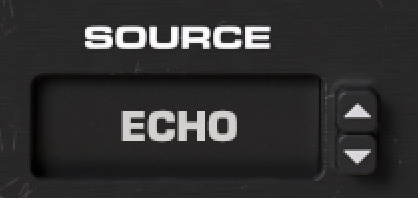
SOURCE Selector
On the original hardware, only the audio input went through the Reverb. The output of the Tape Delay would not go through the reverb.
Stellar Echo SD-201 allows you to configure the Reverb Input Source with the SOURCE selector, providing options that weren’t possible with the original. Use the arrows to the right of the display to change the setting, scroll the setting with the mouse wheel, or click on the display and select a setting from the pop-up menu. The three Source options are:
-
INPUT: Only the input audio is fed through the Reverb stage—the output of the Tape Delay section does not go through the Reverb section. This configuration is like the original hardware.
-
ECHO: Only the output of the Tape Delay section goes through the Reverb section. The input audio bypasses the Reverb section.
-
BOTH: Both the input audio and the output of the Tape Delay section go through the Reverb section. This is a combination of the two modes, above.
DECAY Knob

This knob sets the decay time of the selected Reverb. For the Spring reverb, setting this knob to 100% (12 o’clock) recreates the decay time of the original spring. Turn the knob clockwise to make the reverb decay time longer, or counter-clockwise to make the decay time shorter.
REVERB LEVEL Knob

This knob controls the volume of the Reverb section heard at the output, and its function is dependent on the SOURCE selector setting as follows:
-
INPUT: The REVERB LEVEL knob sets the level of the Reverb section heard at the output using a range of 0% to 100%.
-
ECHO or BOTH: The REVERB LEVEL knob now becomes a dry/wet control, meaning it’s possible to increase the mix to 0% dry / 100% wet such that the original input audio and/or tape delay output isn’t heard with the reverb.
General Controls
INPUT LEVEL Knob
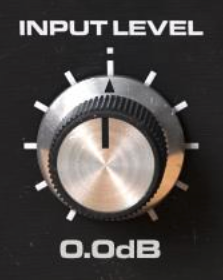
This knob simply adjusts the input audio level as it’s coming in to Stellar Echo SD-201. You normally won’t have to use this knob, but it can be used to make up gain for weak incoming signals (if you want to hit the tape saturation harder) or reduce the incoming signals if the input is too hot.
OUTPUT LEVEL Knob

This knob adjusts the total output of Stellar Echo SD-201—the direct input, tape delay, and reverb levels are all adjusted simultaneously with this knob.
Hold SHIFT when rotating one of the above LEVEL knobs and the opposite amount of rotation will be applied to the other thus changing the internal gain but leaving the output volume unchanged.
DRY THRU Slider
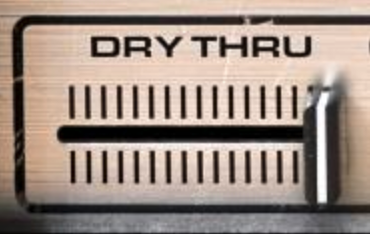
This slider controls the amount of dry audio input that is sent to the output. When Stellar Echo SD-201 is used as an insert effect, you’ll likely want to keep this slider up so that the original audio can be heard in addition to the delays and reverb created by Stellar Echo SD-201.
However, if you use Stellar Echo SD-201 as a send/return effect (placing it on an Effect Return channel in your host application), you’ll likely want to turn this slider all the way down so that only the tape delay and reverb outputs are heard.
CLEAN / NOISE Switch
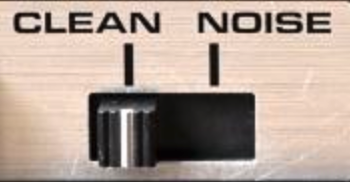
As a tape delay is an analog device, it contains analog amplification electronics which inherently generate some noise. But as Stellar Echo SD-201 is a software plug-in, such noise isn’t necessary. This switch therefore lets you choose whether or not to include the original input noise for an authentic experience or if it should be left out for a more modern and clean sound.
NOTE: On the original hardware where a bit of input noise was always being generated, it was possible to create “self oscillation” by turning up the FEEDBACK control to the highest level. The input noise would be amplified, recorded to tape, and then re-amplified during the Feedback stage. As a result, you could obtain sound from the tape delay without actually inputting any sound of your own. Setting this switch to the NOISE position will allow the same thing to be achieved with Stellar Echo SD-201.
User Interface Zoom
You can resize the Stellar Echo SD-201 interface to better fit your monitor size and working style by clicking and dragging the arrows icon in the lower-right corner of the window. The range is from 80% to 200%.
Keyboard Shortcuts List
| Feature | macOS | Windows |
|---|---|---|
| Modify value | Mouse wheel | Mouse wheel |
| Fine adjustments | ⌘ + Drag Or Right Click + Drag | Ctrl + Drag Or Right Click + Drag |
| Reset value to default | ⌥ + Click Or Double Click | Alt + Click Or Double Click |
| Undo | N/A | Ctrl + Z |
| Redo | N/A | Ctrl + Y |
| Adjust the HP & LP together | Shift + Drag | Shift + Drag |
| Counter-link INPUT and OUTPUT | Shift + Drag | Shift + Drag |
| Offset Repeat Rate in Sync Mode | Shift + Drag | Shift + Drag |
| Momentary FX INPUT MUTE Toggle | Shift + Click | Shift + Click |